The Blog Fixer

  • About
  • Fixes
    • All Services
    • NoFollow
    • Swap Affiliate Programs
    • Remove All Amazon Links
    • Remove Comment Links
    • Internal Permalink Redirect Fix
    • Mixed Content Errors
    • Link Target
    • Image Unlink
    • Amazon Compliance Fix
    • Custom Fixes
    • Live Fix
  • Contact Us
  • Blog
  • Login
  • Cart
The Blog Fixer mascot holding a picture with an alt tag on it.

Using the Image Alt Text Generator Fix

Basic Usage

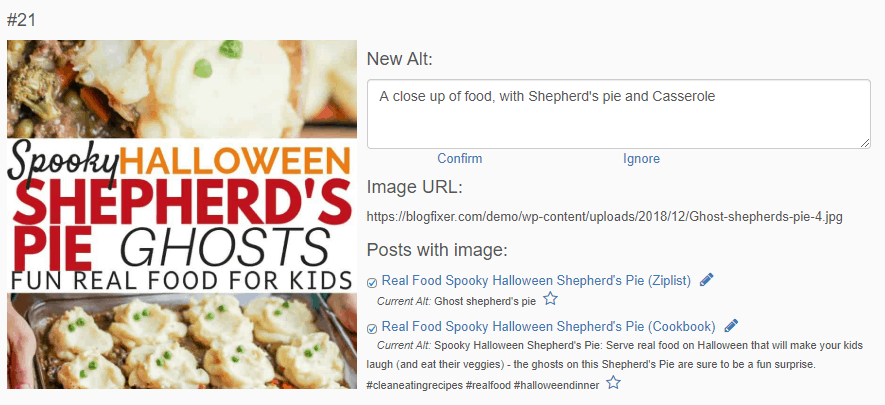
Screenshot of image alt tool

  1. Click on the Tool URL from your service complete report in your dashboard to load the tool. (This is the only way to get into the tool. At this time, there is no link in your WordPress dashboard that can be used).
  2. Go through each image, decide if you want to change the alt text from what is currently, and check out the default alt text
    • If you are happy with the default text and want to use it, click the Confirm link. The image will marked to be updated and hidden.
    • If the default alt text is not correct, make changes in the New Alt box and click Confirm. (You must click Confirm for your changes to be saved).
    • If you don’t want to change the alt text value from what it is currently, click the Ignore link. The image will be hidden.
  3. Continue on until all images have either been confirmed or ignored. Remember: Unconfirmed images will not be changed.
  4. If you’d like to see the images you have confirmed or ignored, click Show Confirmed / Ignored Alt Values at the top of the table. You can then Unconfirm or Unignore any image if you made a mistake.
  5. You can close the page and return via the Tool URL again at any time. Your progress will be saved.
  6. Once you are done confirming all images you care to, click the Fix My Blog button near the top. You should only do this one time – when you have completed going through all the images.

Other Features

  • Click on the image itself to see it in its full size
  • Screenshot of the post details section of the image alt toolClick on any of the post names to open the post the image is found on in a new tab to get additional contents
  • Click the Pencil icon next to the post name to open the post up in the editor
  • Click the Star icon next to any existing alt values to place that alt in the New alt box. This is useful if an image is used multiple times with different alts, and you want to make one of the active for all
  • Remove the checkmark next to the post name to prevent that post from being updated, even if the image is confirmed (for example, if the image is found on multiple posts and you only want to update one of them).

Get Help

See our article on best practices for alt values.

Please do not hesitate to reach out with any questions you have along the way.

  • Become an affiliate
  • Privacy Policy
  • Terms and Conditions

© 2023 · KFT Solutions